Managing Queues
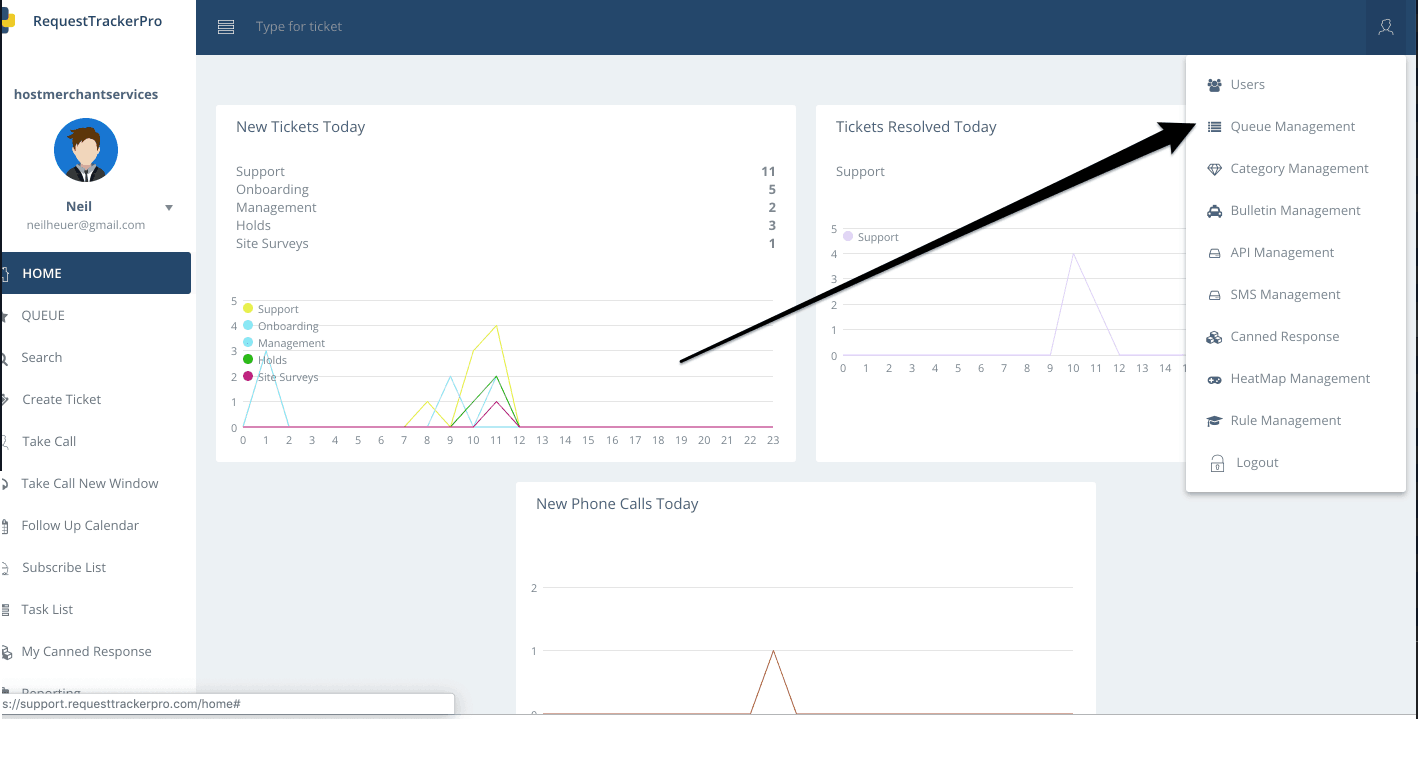
Go to the Queue Management page to manage all your queues.
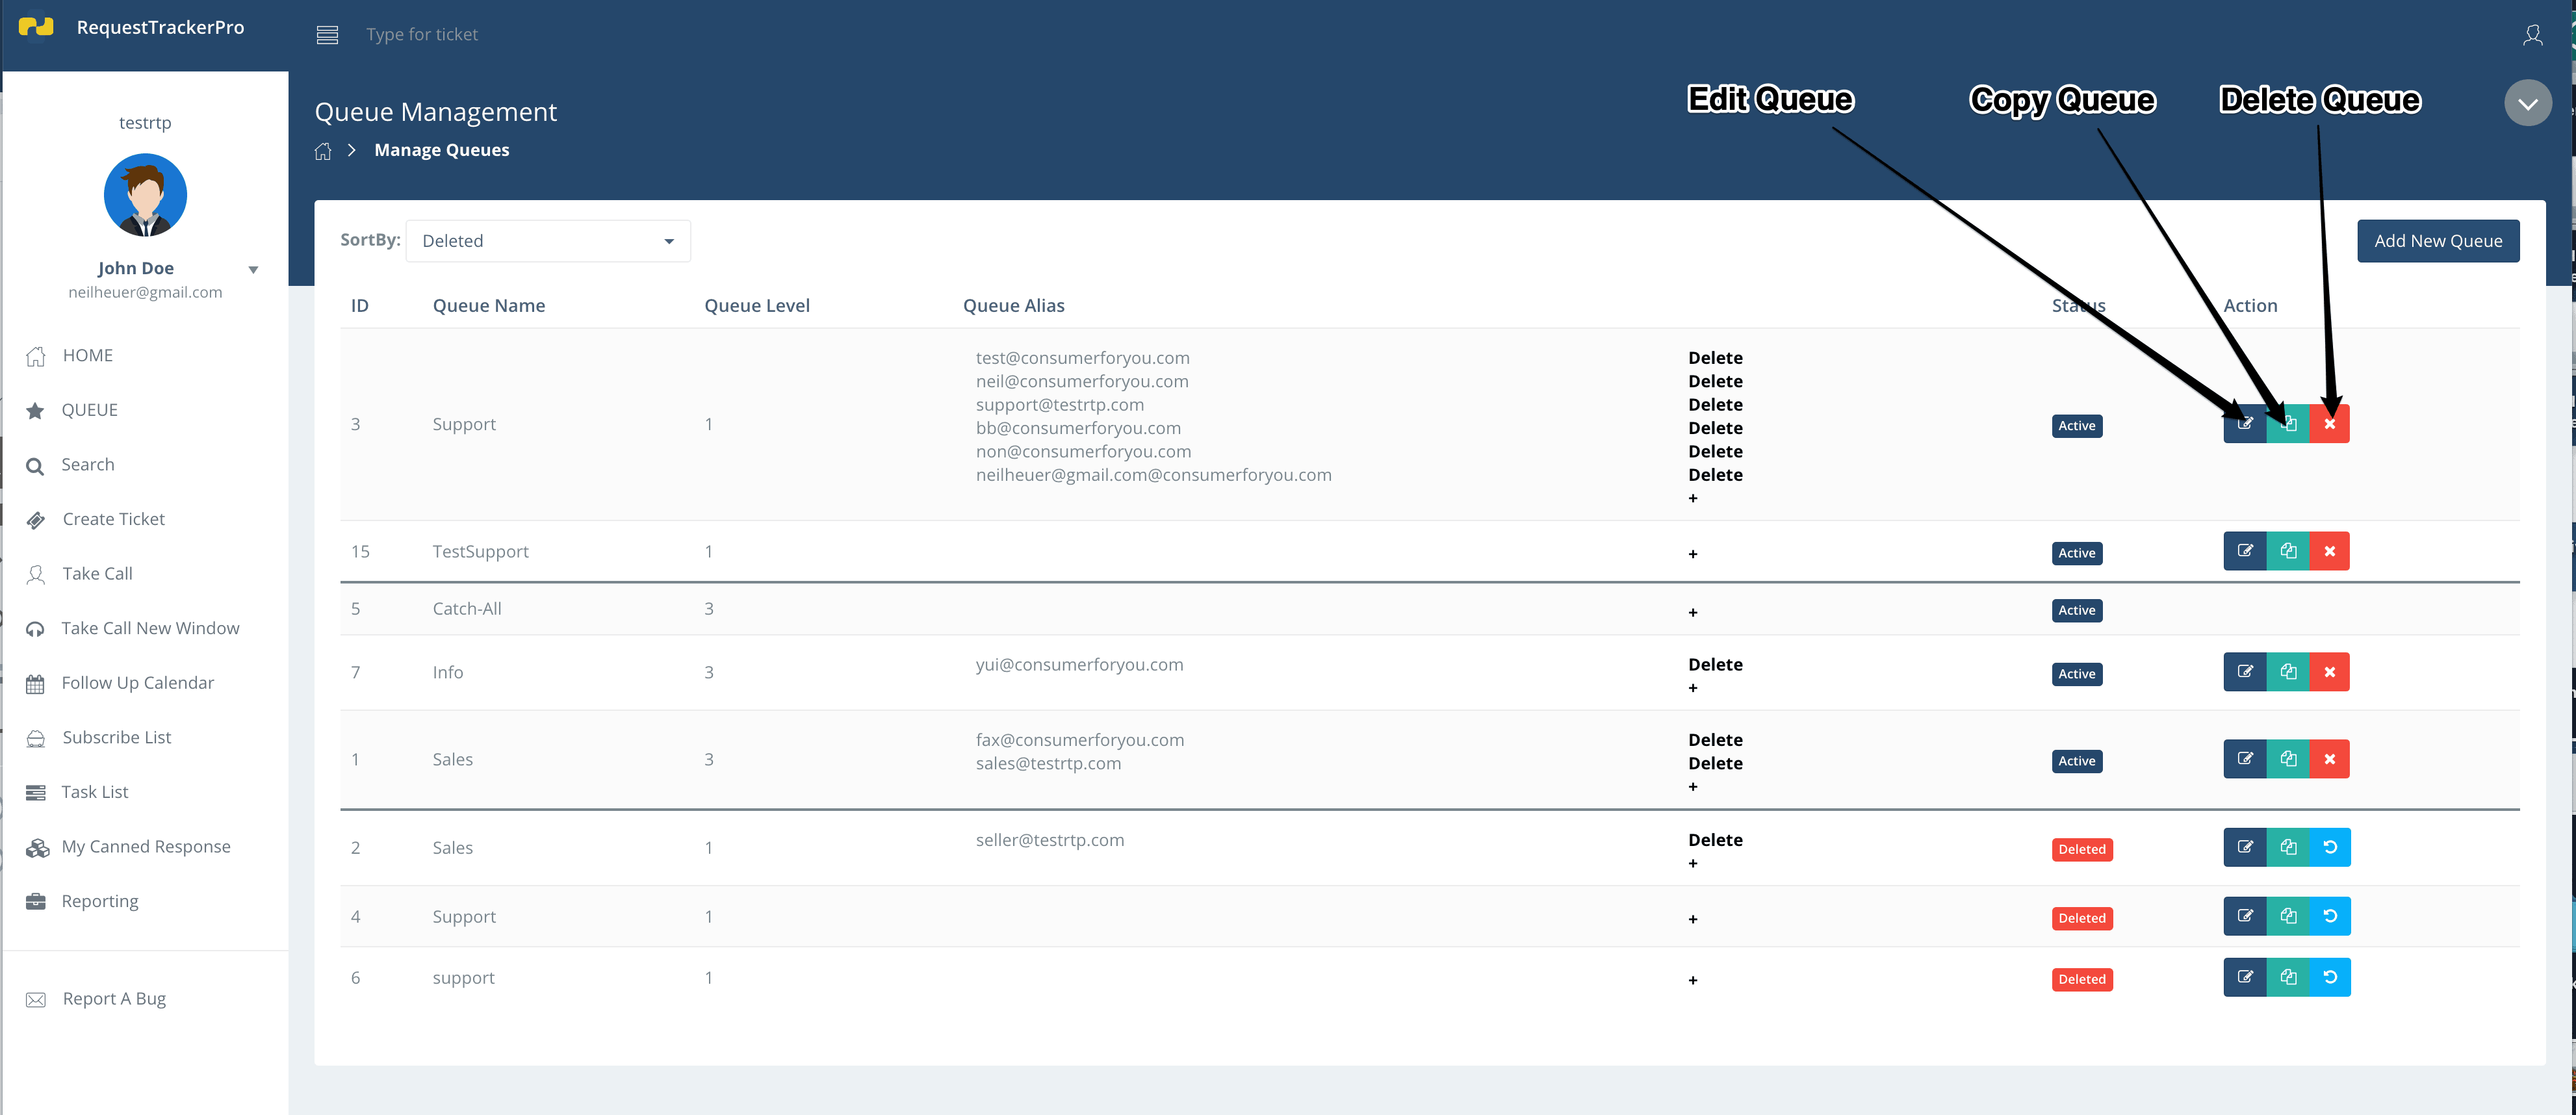
This is where you can add, edit, copy, or delete queues. Each queue has edit, copy, and delete buttons.
Creating A Queue
Once on the Queue Management page, click the Add New Queue button to add a new queue.
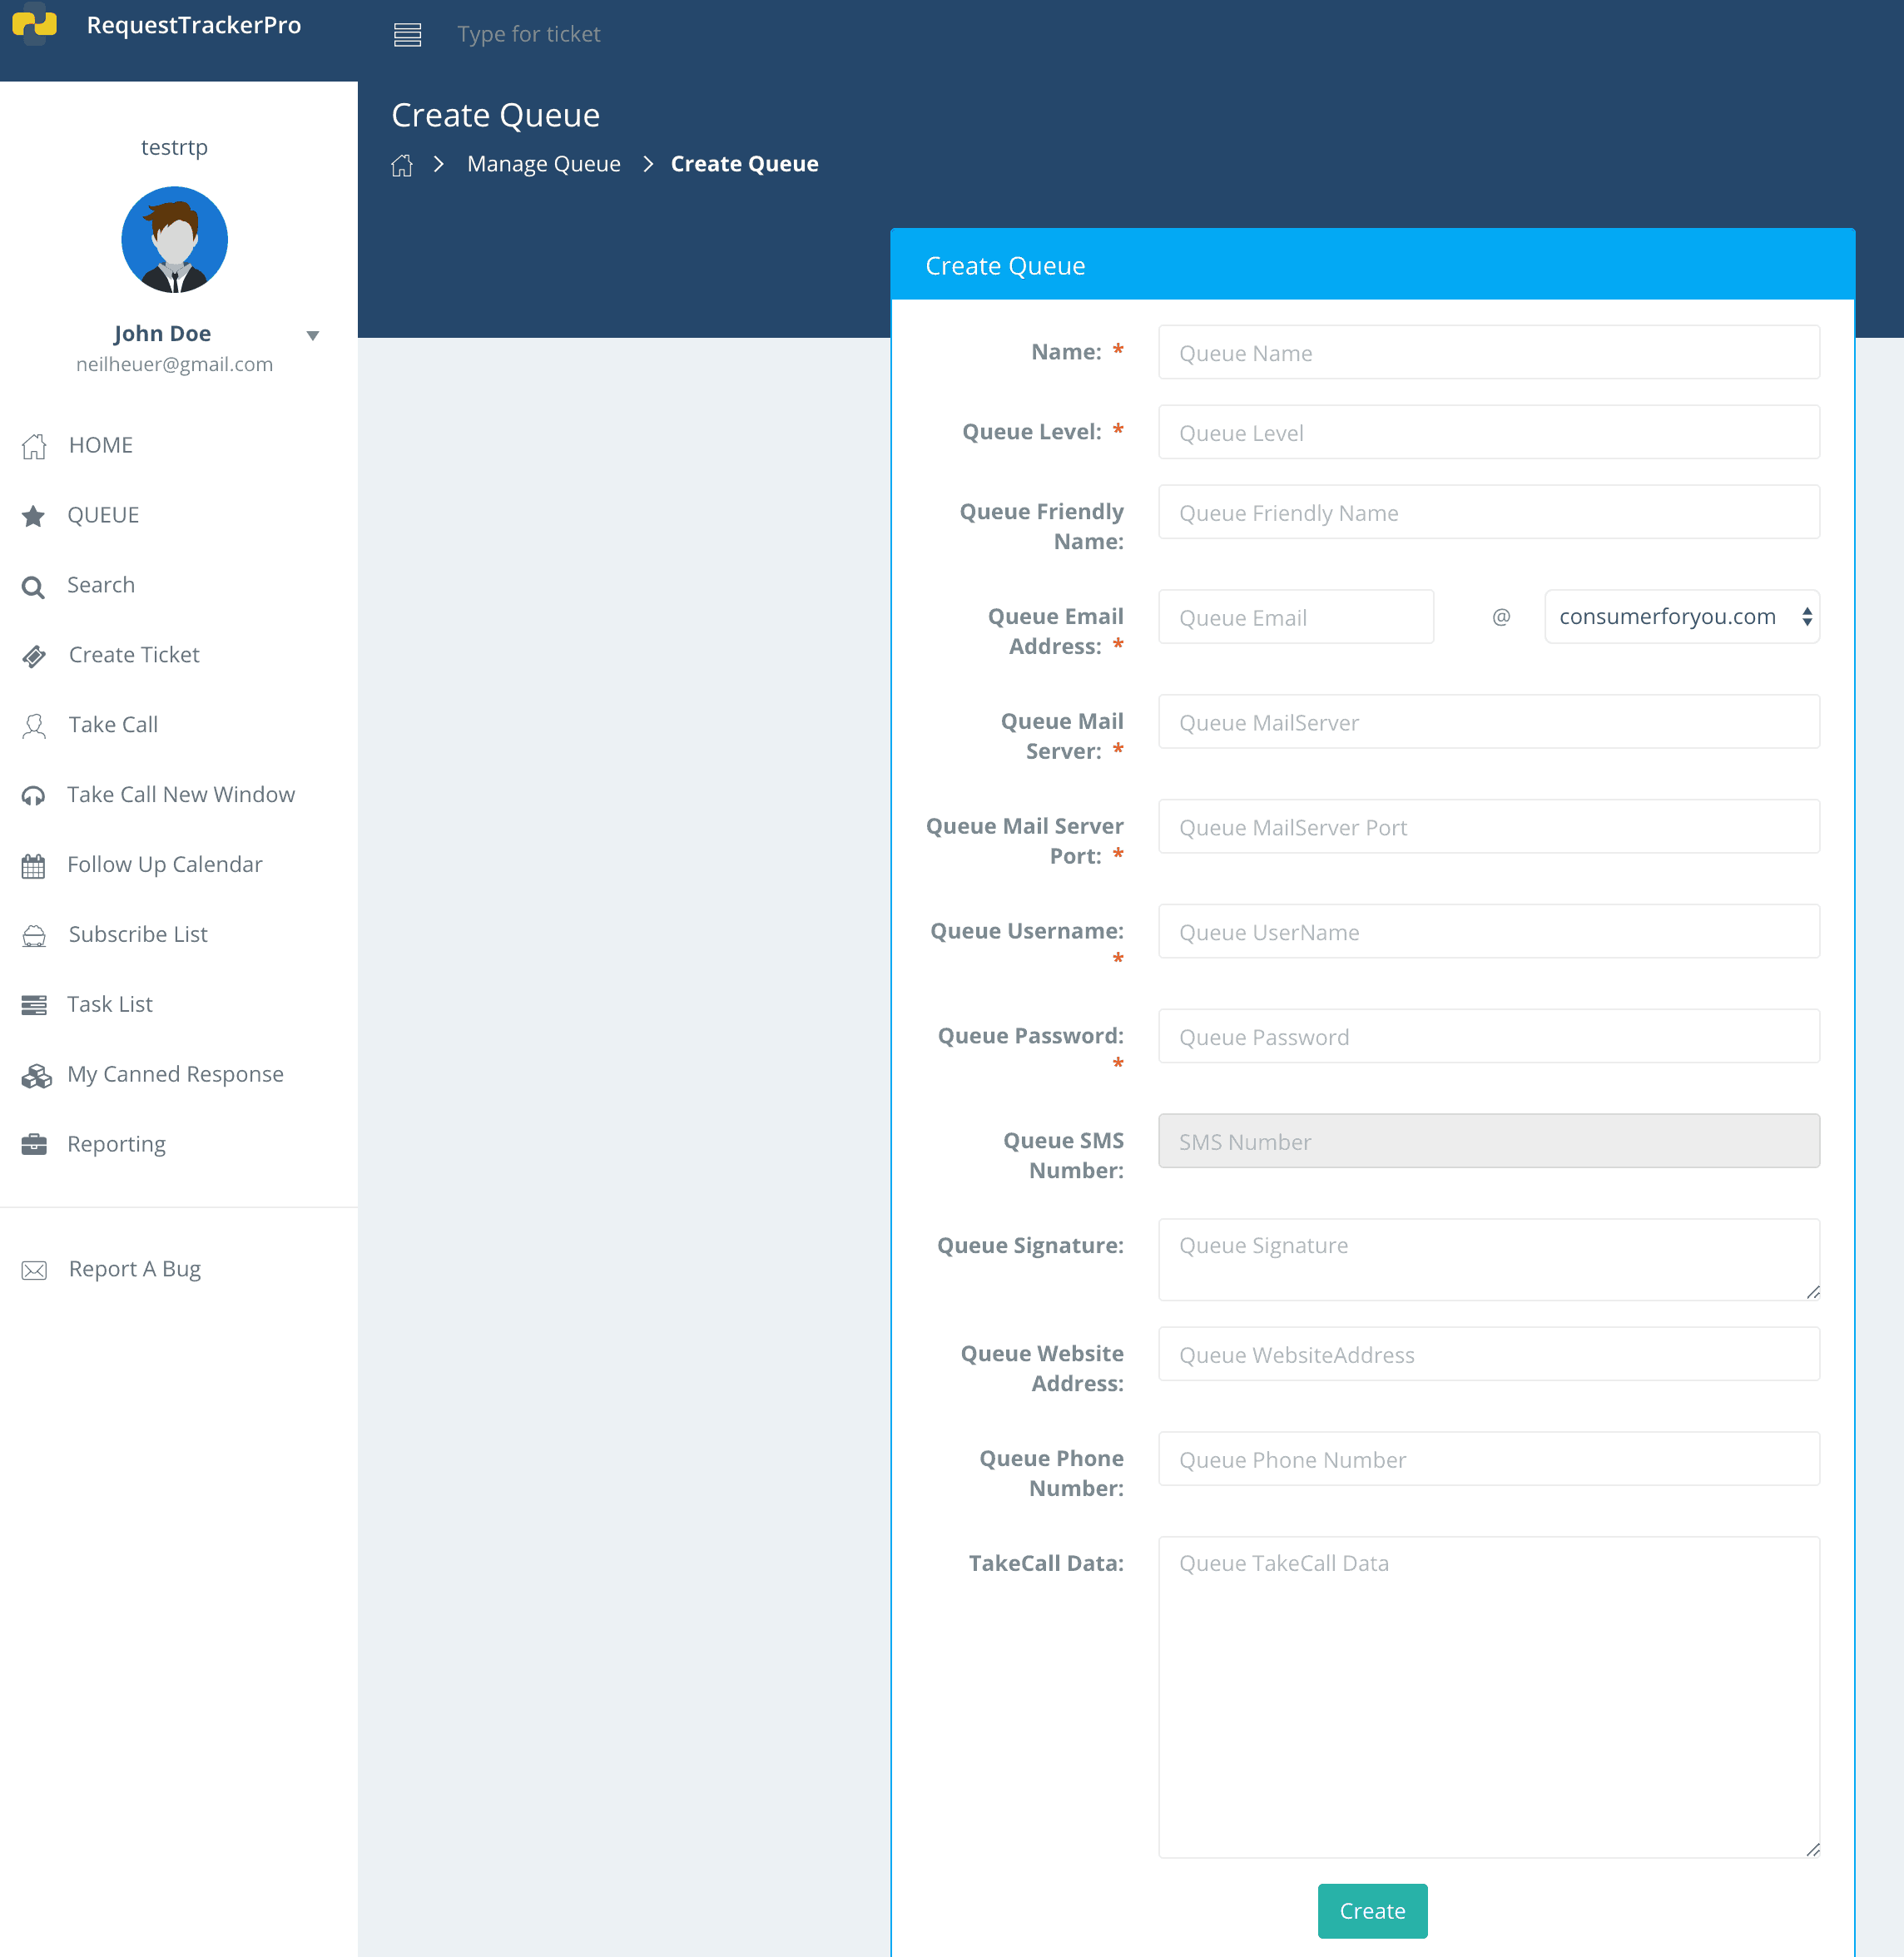
The above screen will appear. While this screen may look intimidating, the process is simple for adding a queue. Let’s take a look at the different fields.
Name – Give the queue a name. In this example, we’ll name the queue Support.
Level – This will be where the queue shows up in the main queues page. The lower the number, the higher on the list. The higher the number, the lower the section of the page. Levels do not have to be unique and you can use the same levels to group queues however you think best.
Friendly Name – This is the name that email clients will see when you or your agents reply to an email.
Email address – This is just the beginning part of an email address. If your email is support@yourdomain.com then you will only enter support in this field. Then, select yourdomain.com in the drop-down list. Others can be added by contacting support@requesttrackerpro.com.
The next 4 blanks are the technical details of your mail server, its port, login, and password. This information allows your responses to originate from your servers directly, instead of appearing to come from some third party email address.
Please consult your email administrator to find your mail server information, if you don’t know it already. If you still need help, please contact us at support@requesttrackerpro.com.
SMS number – You will see this field if your account has an SMS plan associated with it. The number you enter will be where requests are received and sent from.
Note: SMS number(s) are managed from the SMS section of your account. Please set up your number in the SMS section before trying to add a phone number to a queue. Once you add a number, you’ll be able to choose that number when adding a new queue.
The signature, website address, phone number fields make up your email signature for this queue.
Here’s the format for email signatures:
Best Regards,
Agent Name
Email: Address For Queue website address
Signature Tag Line
Phone: XXX-XXX-XXXX
Here’s an example of what an email signature will look like:
Best Regards,
John Doe
Email: support@yourdomain.com www.yourdomain.com
This is our signature line.
Phone: 800-555-1212
TakeCall Data – This field is for any questions or comments you want to appear in the Content box when an agent is taking a phone call. For this example, this creates a standard that all questions be asked when customers call in and ask for support. This makes sure the right questions get asked at the right time and prevents key information from being missed when servicing customers.
Duplicating A Queue
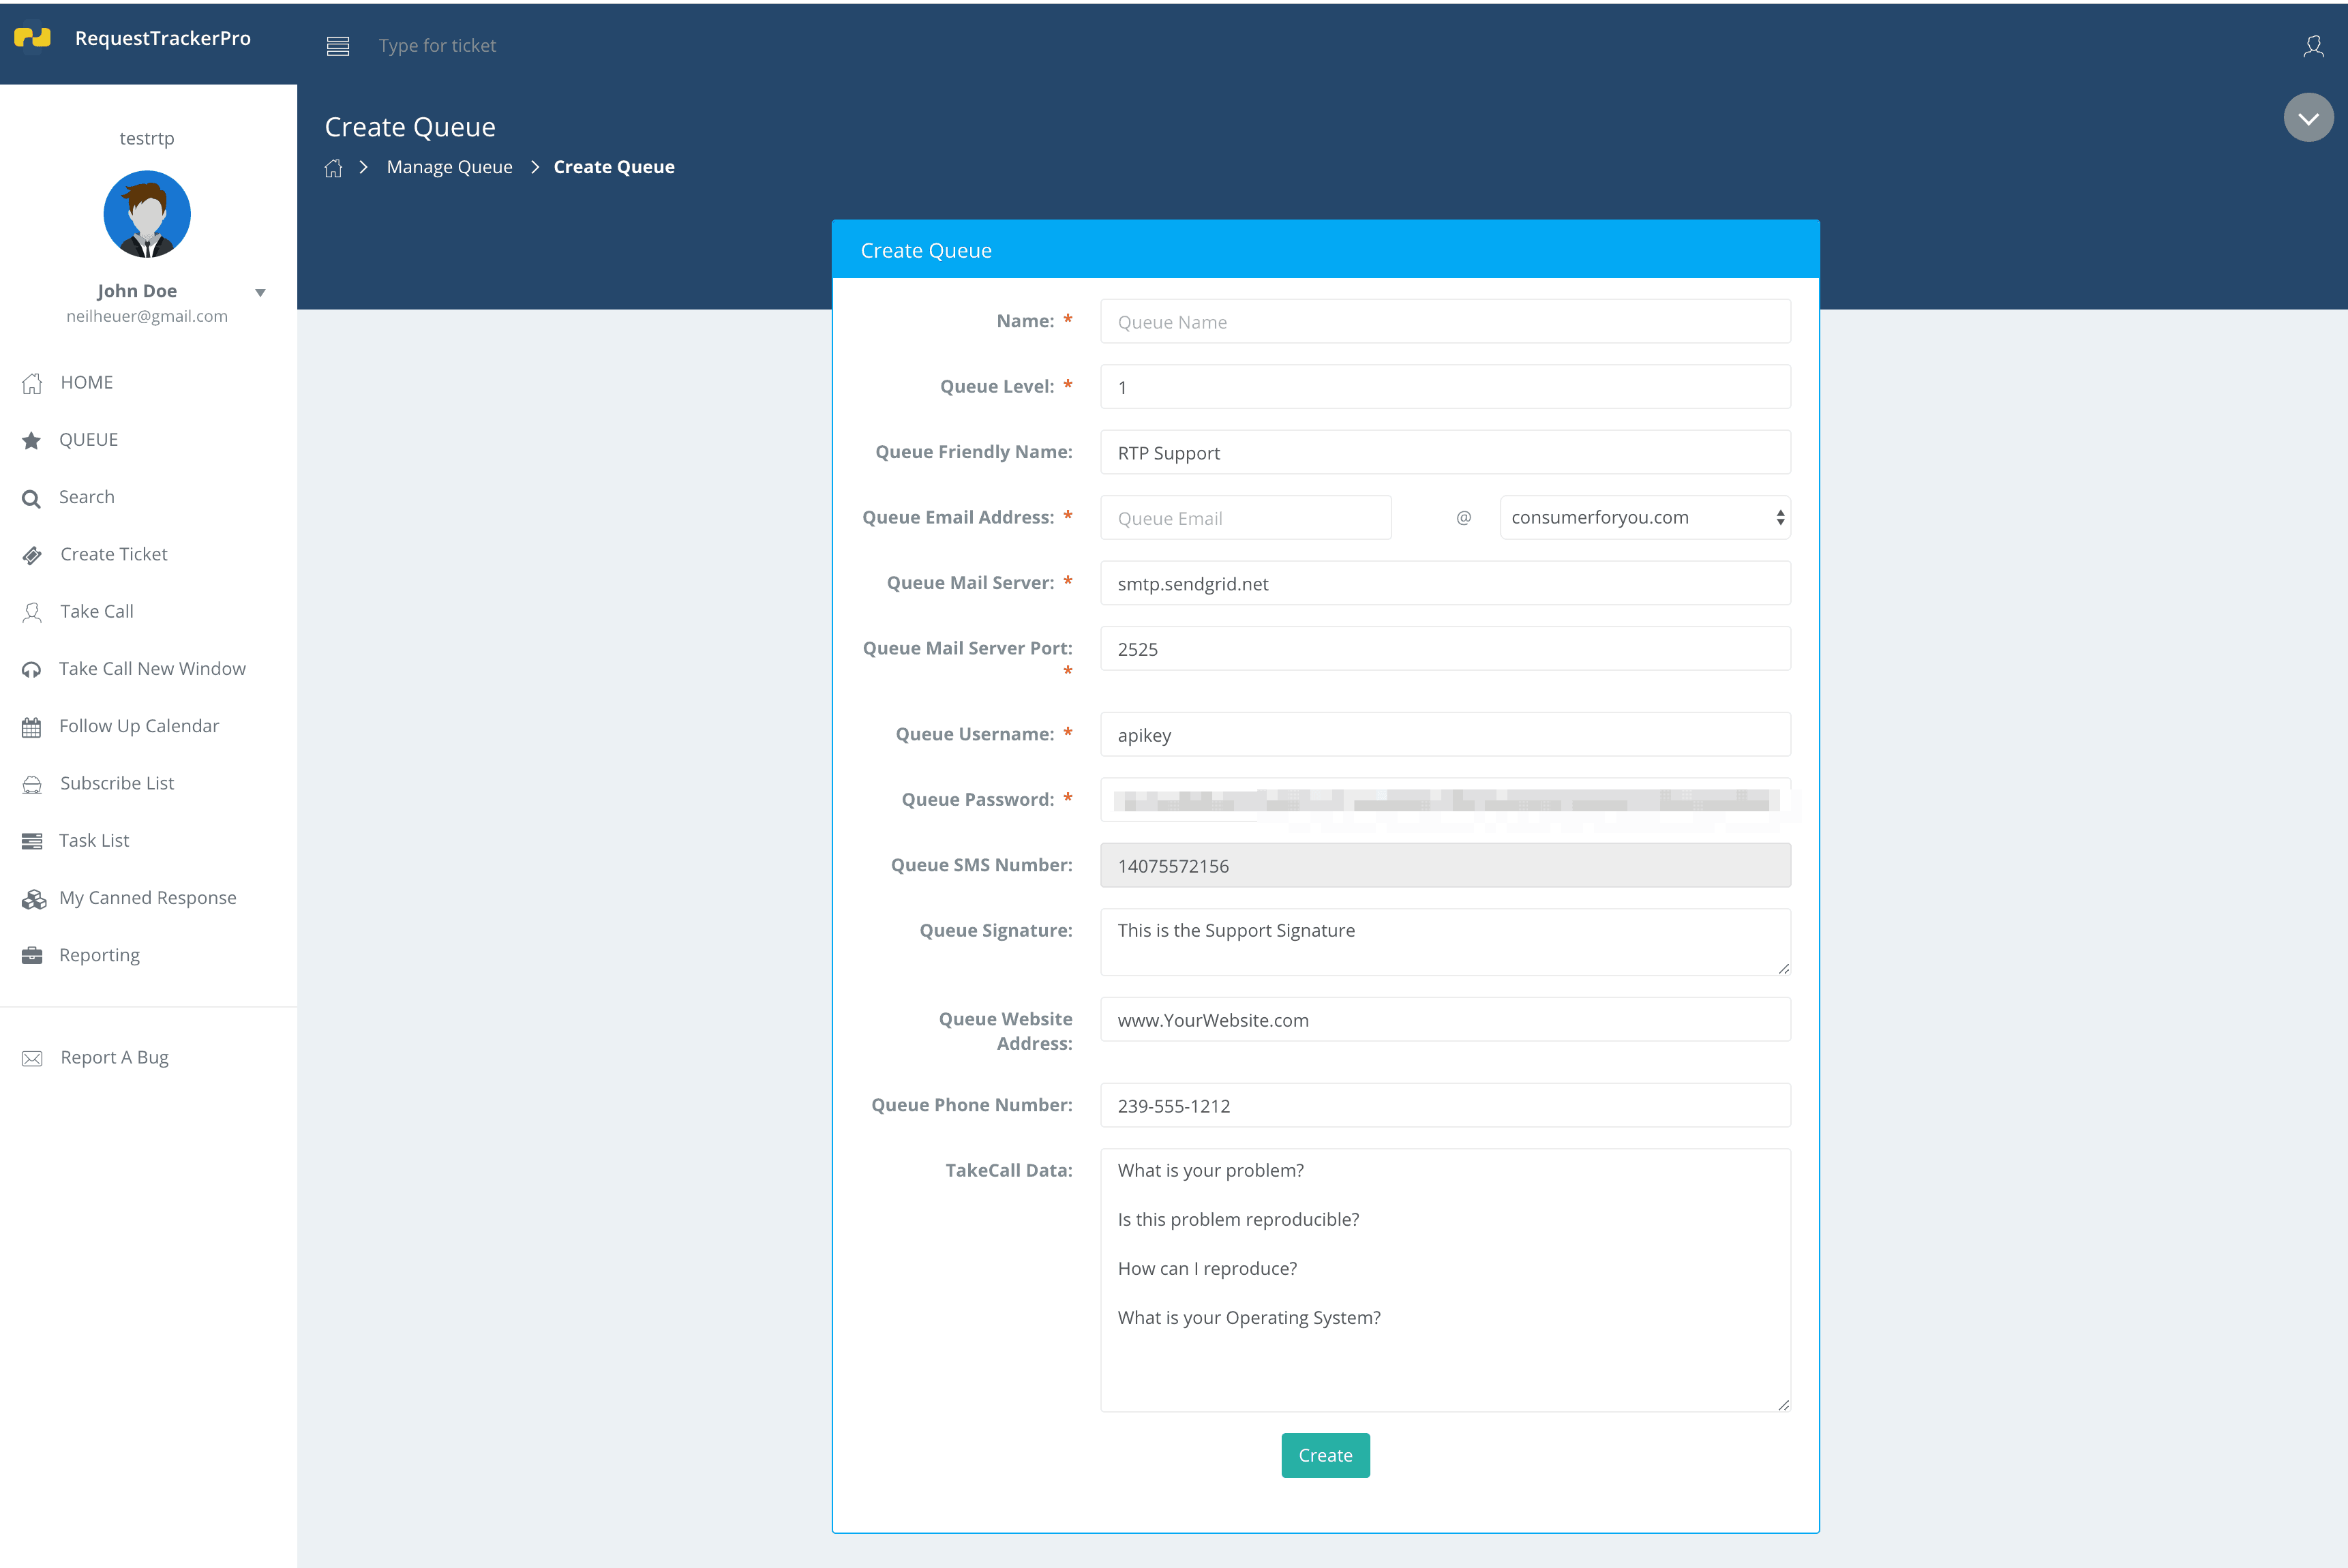
Go to the Queue Management page and find the queue you want to duplicate. Click the copy icon to duplicate it. You’ll be presented with the option of changing the new queues information.
Note: The email address and name fields will be blank. You must fill out this information to successfully duplicate q queue.
Once you finish filling everything out, click Create to finish creating the new queue.
Deleting/Undeleting A Queue
Go to the Queue Management page to delete or undelete a queue.
To delete a queue, click the delete icon for that queue.
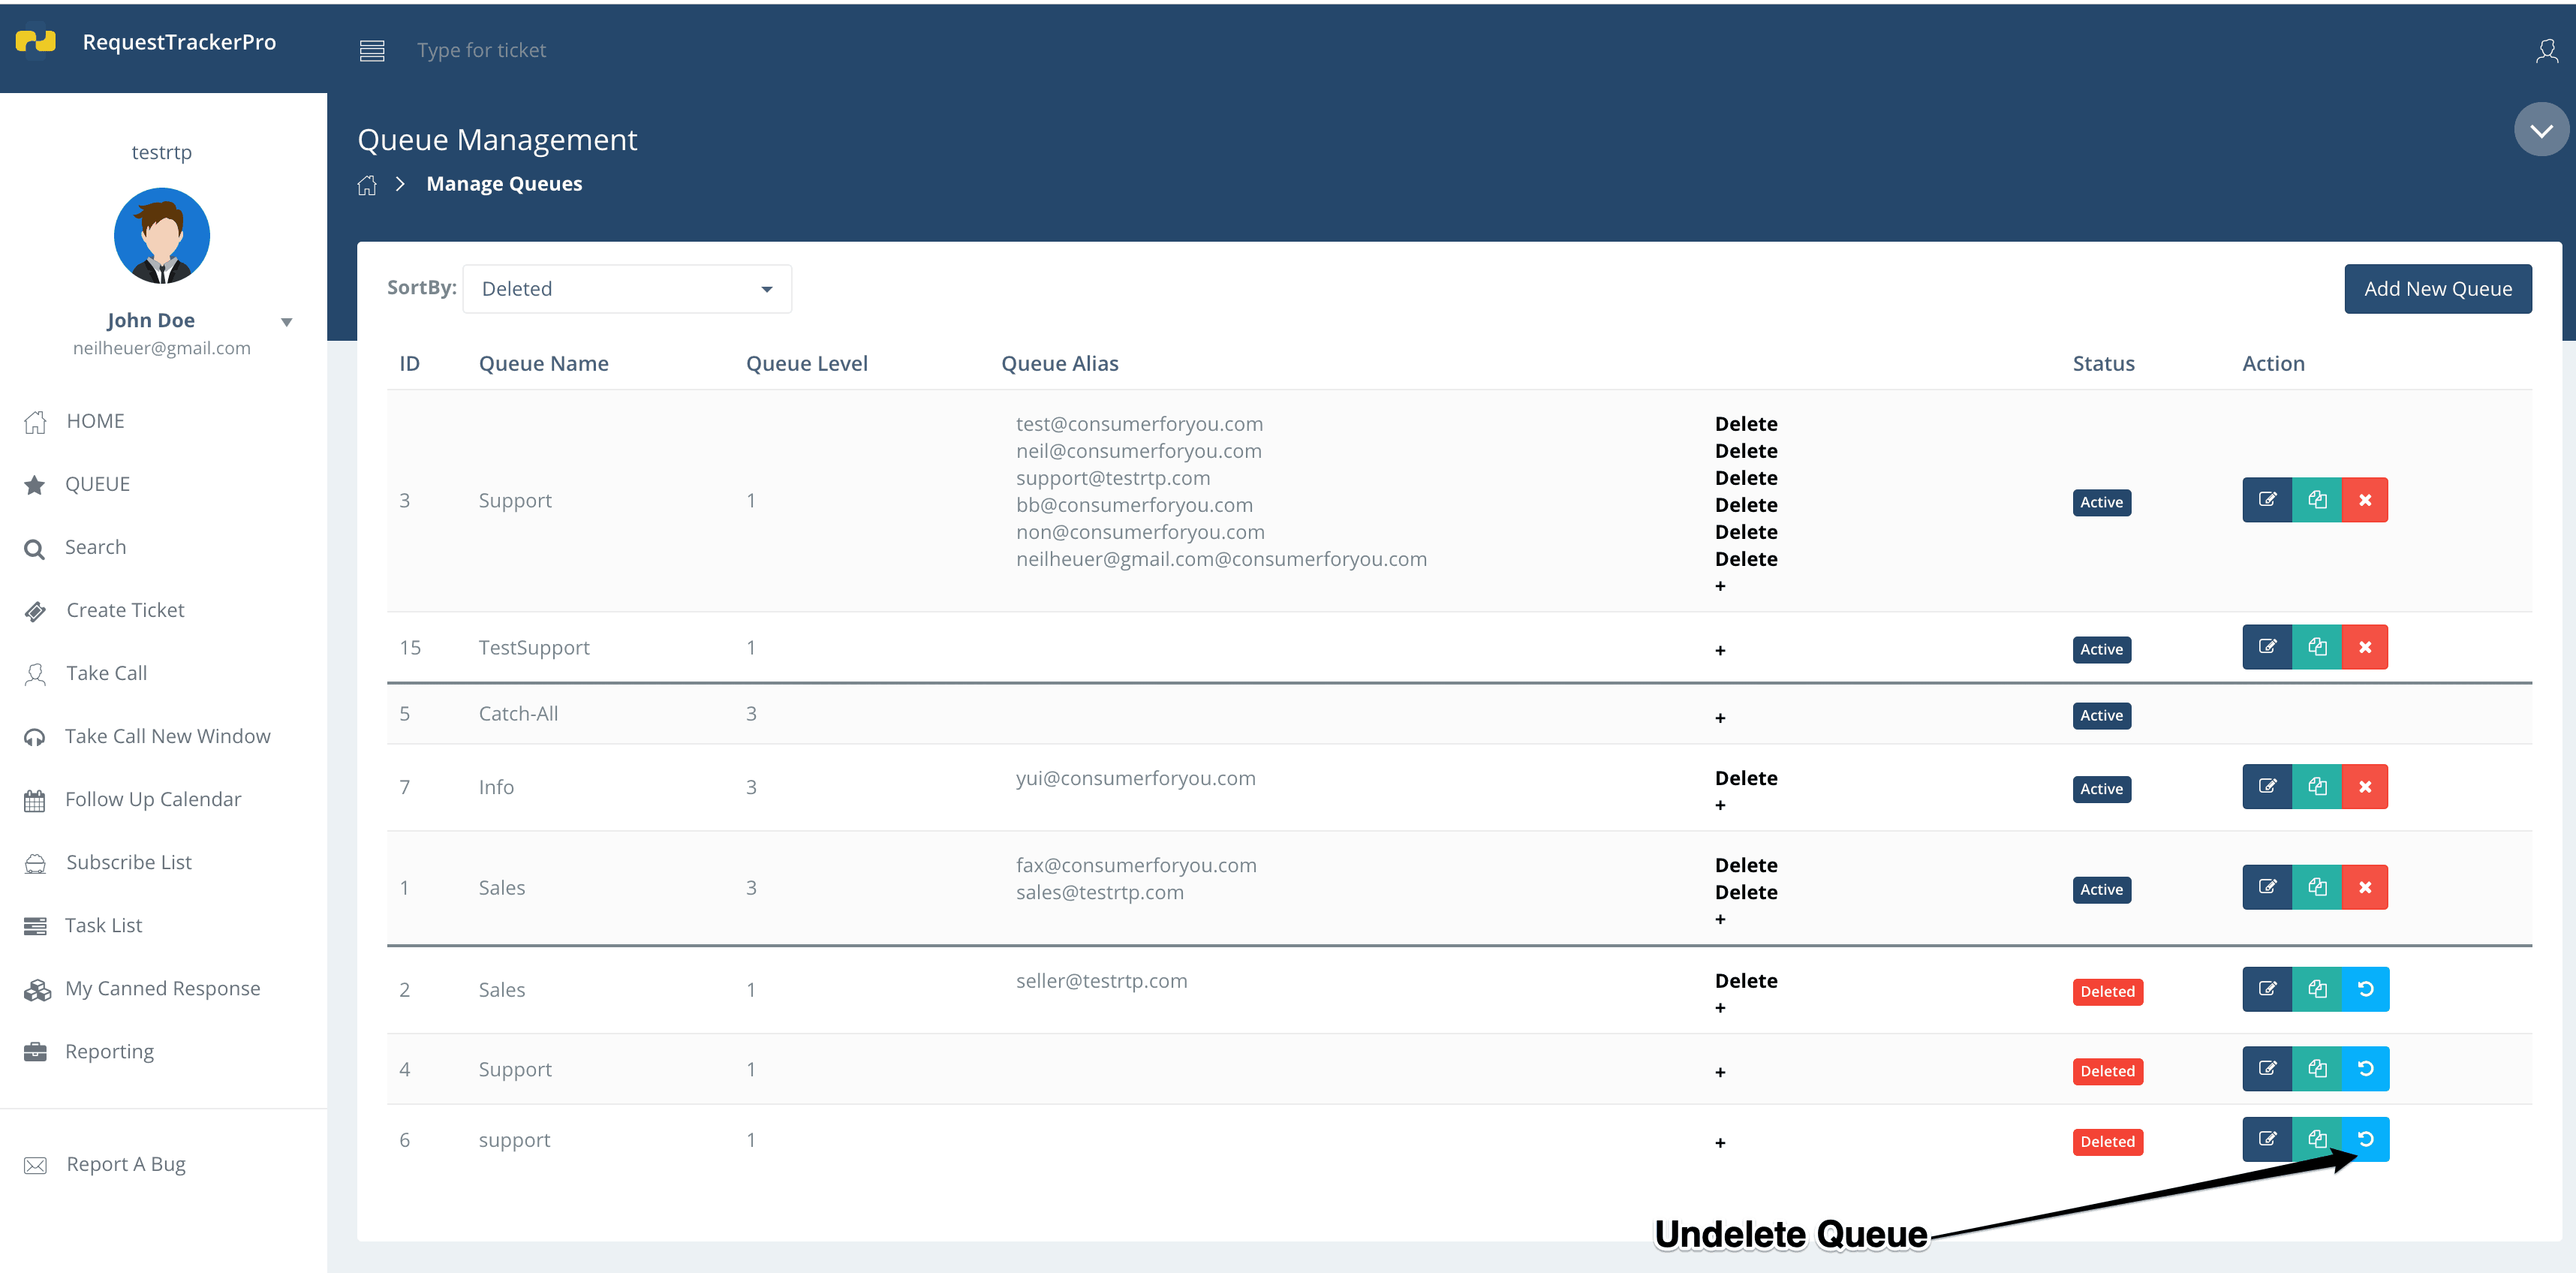
To undelete a queue, you’ll notice a new undelete icon. It’s a blue icon with a half circle. Click that to undelete and restore the queue.